1. What does the Helo do?
The AJA Helo, in a nutshell, does 2 distinct things: it records an SD or HD video signal and also streams a signal to just about any streaming service you can find. Pretty simple, right?
But before I get too much deeper, let’s take a quick look at where the Helo may work for you in a production environment.
Here we see a typical small production setup. We have our cameras…and we have our capture device that takes in the cameras and other video sources….next we have the switcher which cuts between angles, adds graphics, and mixes audio…..and now we have our streaming device to get out to the internet, and lastly, the web host or CDN that takes our signal and shares it with the world.
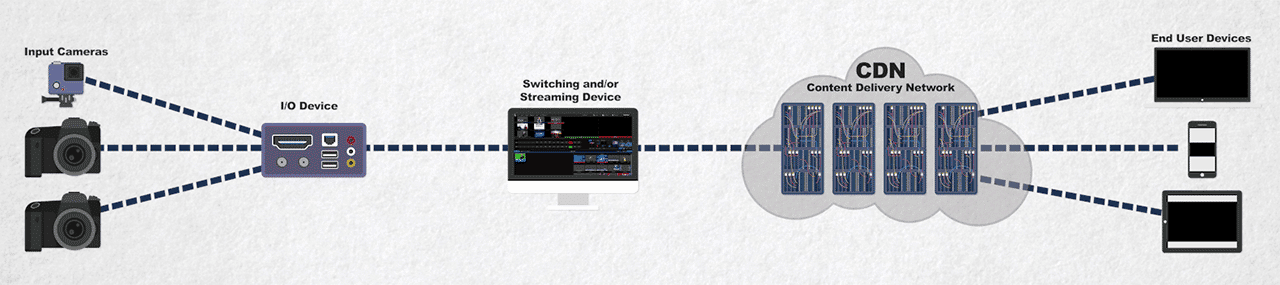
A traditional live production workflow.
The Helo is that streaming device, and as an added bonus can also be a recording device. Let’s take a look at how the Helo does this.
First, the unit has 2 separate encoders. This allows the Helo to encode the incoming signal in two discreet ways – one as a local copy, and one in your streaming format du jour. This is pretty cool because it means you’re not stuck with an archival version that was optimized for live streaming – it can be recorded at a higher frame rate and frame size so you can edit it after the event.
This recorded copy can either be written to a local USB drive or RAID, to a network mount point, or even to an SD card. As the encoder is limited to h.264, and tops out at 20Mbps, all of these onboard storage methods provide plenty of bandwidth with which to record the incoming signal. 20Mbps is pretty cool; as it’s a higher data rate than most other portable encoders out there.

The rear of the Helo, with both SDI and HDMI sources (only 1 can be used at a time)
Speaking of the incoming signal, the Helo has an SDI and an HDMI spigot, however, only 1 can be used at a time. Aside from embedded audio on these inputs, there is also an unbalanced 1/8” jack if you’re into the second system audio kinda thing. Now, the Helo handles signals up to 2K at 60 frames, however, it tops out recording and streaming at 1080p60.
1080p60 – now, this is really important.
1080p60 is often requested for sporting events and gamers where higher frame rates and frame sizes are needed. Many other portable encoders on the market will top out at 720p60, or at 1080 with slower frame rates.
The Helo has the ability to stream to virtually any of the platforms you’d want to stream to via RTMP and RTSP. RTMP will cover a vast majority of the popular CDNs, including YouTube, Facebook, and Twitch.
What the Helo does lack is out of the box are pre-baked CDN presets. However, you can easily create those manually inside the box for re-use. Thus, you do need to understand what the CDN you’re using is looking for. Luckily, a simple Google search for the RTMP settings for the popular platform you’d like are usually widely published.
2. How do I use the Helo?
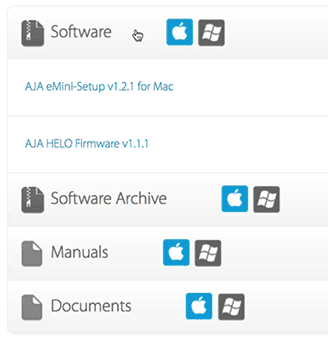
Download the latest firmware and utilities for your Helo at https://www.aja.com/products/helo#support
A few things you need to do, handy person.
As the unit is new, firmware updates have been coming frequently. So, go to the AJA website and download the latest firmware. With this being the IBC 2017 season, look forward to new firmware announcements. Also, you’ll want to download the AJA eMini Setup Utility and install it. This will allow you to update the unit’s firmware to get the latest features and bug fixes.
Now, let’s get the unit some juice with the included power supply, and connect the supplied USB cable to the unit; and plug the other end into your computer. Launch the Setup utility on your computer and update the unit’s firmware.
OK, now we need to get a signal to the unit via HDMI or SDI.
If using this for streaming, this will come from your switcher’s output, or even the output of your camera if your production is more of a “set it and forget” type of affair. Don’t forget your separate audio line if your audio is coming in from somewhere else.
Now, the unit also has an HDMI, SDI and Audio output as well, so you could route these outputs to a monitor and mixer to check things, or, place the Helo in front of your switcher in order to have a clean recording from your camera– also called an ISO of your signal; albeit in an h.264 format.
On the rear of the unit is the LAN port, where you’ll want to run an Ethernet cable to the Helo and out to your router or switch so you can do the initial setup and control the Helo. There is no WiFi on the unit, or a way to use a portable USB LTE modem, so you’ll need to ensure you have a hardwired line.
Back in the eMini Setup, there is a button to launch the web page that controls the unit. Your unit should be set to DHCP, so it should grab an IP address from your network when you plug it in.
You should probably at this point decide that if you are going to record the incoming signal, where is that recording going to land? If it’s on a USB drive, that drive should be USB 2.0 or 3.0, and be formatted as ExFAT or FAT32.These are cross-platform, folks, not Apple HFS or Windows NTFS. This can be a RAID as well. If you’re going to an SD Card, make sure those are only formatted as ExFat. Lastly, if you’re going to a network mount point, ensure you’re using NFS or CIF protocols.
3. How do I control the Helo?
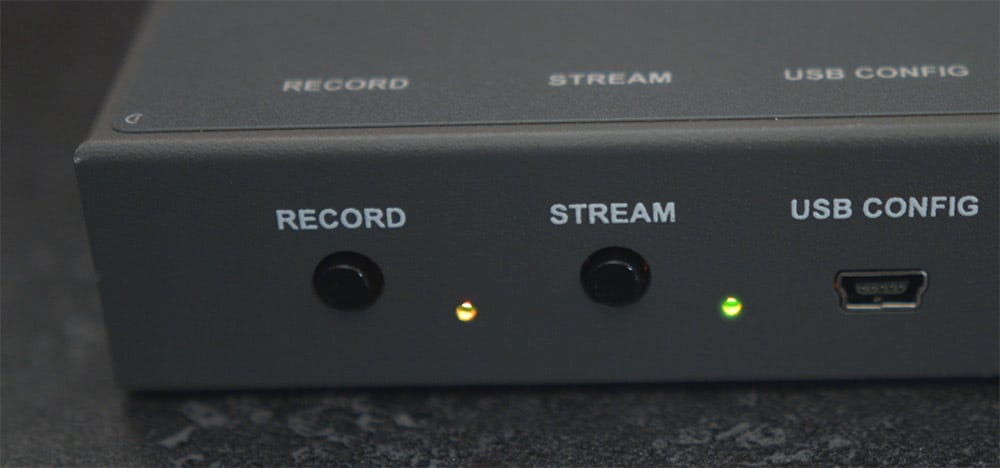
Front buttons on the Helo to trigger recording or streaming independently
We’ve got two ways to control the unit. We’ve got end-user controls and then the way *I* like.
The end-user control consists of physical buttons on the Helo for recording and streaming, so you can engage or disengage each of the functions independently of one another. Very simple, and very handy if nontechnical folks are going out to record or stream an event.
And now the way I LIKE to handle things – my way.
The Helo gets setup and can be controlled via your web browser; this is actually where you set up the parameters of the end-user controls. Now, while the web browser access makes things easy and AJA gets points for functionality, their graphical interfaces have never been the most eye-catching. Function over form. If you’ve ever used other AJA converters and recorders, like the FS series or Ki Pro Family, then the interface will be very familiar.
It’s from here you can monitor the status of the unit, and see a summary of the parameters that have been selected and saved on the unit. At the top of every page is a current graphical representation of the recording and streaming status of the unit, and you can use the mini icons here to bounce back and forth between the recording and streaming functions.
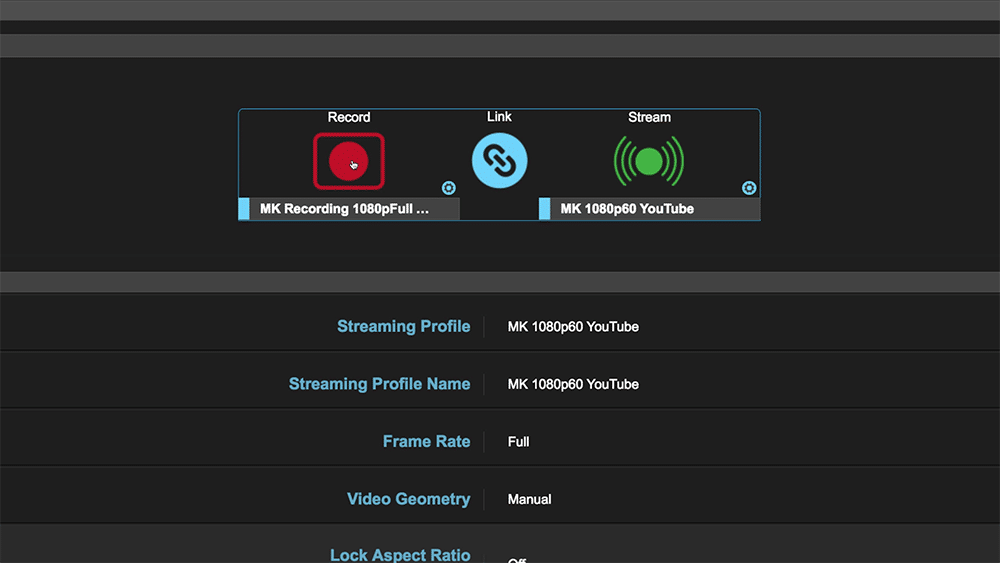
AJA Helo web interface shows the current status of the unit.
If I haven’t beat this into your head already, this is also where you can independently alter the recording and streaming parameters of the Helo, and then save them, which AJA calls Profiles.
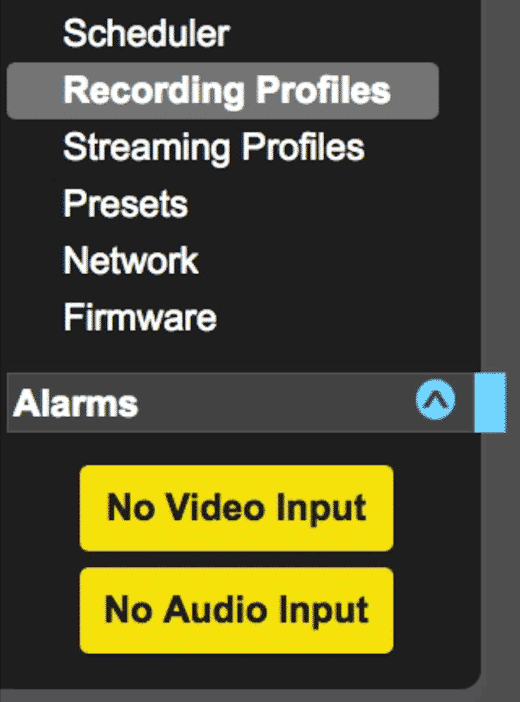
Alarms on the Helo
This is where things can get a little confusing.
The Helo has Profiles for recording and streaming – 10 profiles for each. However, these profiles are not the same as Presets, which are system-wide groups of settings that you can save to the Helo.
For example, you may have a recording profile for 720p, and a streaming profile for 1080p. These are controlled independently, but a preset would configure both streaming and recording profiles in 1 setting – a preset.
Through this methodology, you could mix and match profiles to create specific presets. Perhaps you could use this for various physical streaming locations, coupled with various camera gear and the available bandwidth at that location.
Of the myriad of controls for each encoding parameter, there are some of note. You can change the level of your h.264 encode, from constrained, to baseline, to main, and to high. You can also de-interlace if the unit is getting an interlaced video signal, Plus, you can set the naming convention of your recorded clips, and you have the option of MOV or MP4 wrapped h.264 clips or simple TS streams.
**While not mentioned in the video, the video quality slider (bitrate) displays both a green and red area. The green area is the recommended encoding bitrate(s). Red areas are not recommended bitrates, either because they are too low or too high. If you attempt to set the recording bitrate outside of the area, the Helo will override your input bitrate and instead move it into the green area. This is the Helo adhering to the Kush Gauge. Unfortunately, this happens behind the scenes (as of 2.0 beta firmware). So, keep that recording bitrate slider in the green.
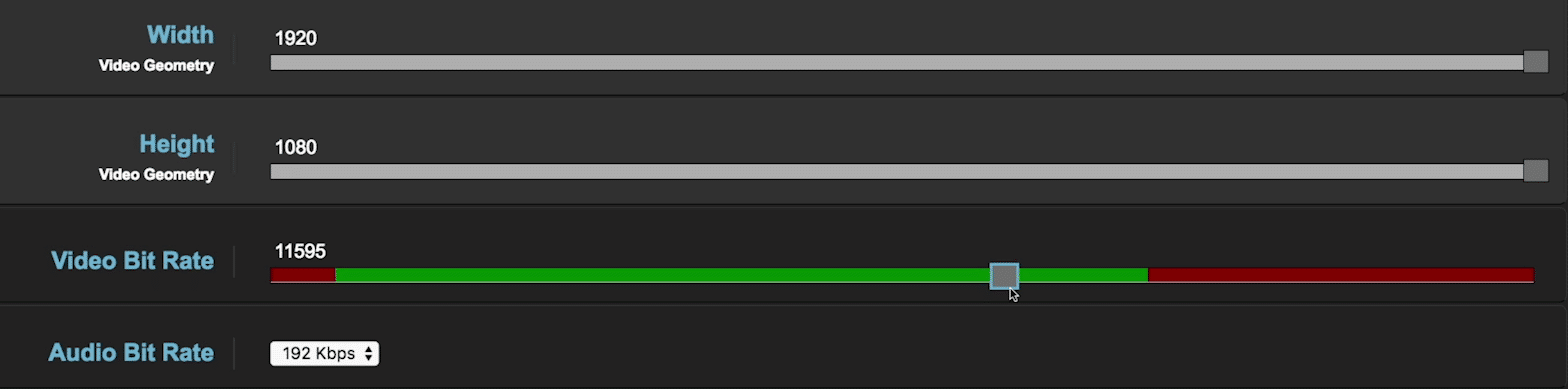
AJA Helo Video Bit Rate – stay within the green area!
What I dig is the easy “oh &$*# what’s wrong menu” on the left-hand side, where you get immediately notified of any errors that may be happening.
Lastly, if you don’t want to use the hard buttons on the front, or use the webpage, Helo can take a calendar entry, like a Google calendar appointment or an ICS file to automatically trigger recording or streaming at a predefined date and time. Very simple.
4. How is the quality?
I’m very impressed with the image. More so with the streaming than recording, but I’ll get into that in a minute.
Often when you compress a video signal down, one of the first things to be lost are the details in the blacks. I find that if you keep your data rate high enough while still adhering to the specs of the CDN you’re using, the details in the darks translate very well from the Helo.
I did over 3 dozen recording and streaming tests, encompassing various record times and at multiple recording and streaming bitrates, with no hiccups attributed to the unit. I did find with very early firmware issues that I would sometimes get a frame or 2 video hit while streaming on YouTube, but that seems to have been rectified with newer firmware versions.
This does bring up an important point: and that is, always do a test from the location you’re streaming from before the day of the event. Congested networks and limited upload speeds can cause you to drop frames while streaming. Just because the unit can stream at 20Mbps, doesn’t mean you should do it.
As far as recording, I’m not a fan of recording into h.264. I figure if I’m going to record an ISO, or record the output of the switcher, I want something that’s high enough quality that I can manipulate the image in post, whether that be a color pass, or maybe even a re-edit…or even for archival purposes. H.264’s tend to fall apart after subsequent encodes.
On the flip side, if you don’t plan on doing any manipulation of the recorded video, you now have a great looking recorded h.264 that won’t take forever to upload for VOD later.
I’ve posted some examples of how the recorded image looks immediately below (click on the resolutions below in the chart). You can download ‘em and see how they look.
| Source | 1080p23.98 (ProRes 422 HQ) | |||
|---|---|---|---|---|
| Helo Record Frame Size and Frame Rate | 1080p23.98 | 720p23.98 | ||
| Type of Recording | Color and Resolution | Motion | Color and resolution | Motion |
| 1000Kbps | 1080p2398 to 1080p2398 1000Kbps | 1080p2398 to 720p2398 1000Kbps | ||
| 2500Kbps | 1080p2398 to 1080p2398 5000Kbps | 1080p2398 to 1080p2398 2500Kbps | 1080p2398 to 720p2398 2500Kbps | |
| 5000Kbps | 1080p2398 to 1080p2398 10000Kbps | 1080p2398 to 1080p2398 5000Kbps | 1080p2398 to 720p2398 5000Kbps | 1080p2398 to 720p2398 5000Kbps |
| 6000 – 10000Kbps | 1080p2398 to 1080p2398 10000Kbps | 1080p2398 to 720p2398 10000Kbps | 1080p2398 to 720p2398 6000Kbps | |
| 11000Kbps+ | 1080p2398 to 1080p2398 15000Kbps | 1080p2398 to 1080p2398 14000Kbps | ||
| Source | 1080p29.97 (ProRes 422 HQ) | |||||
|---|---|---|---|---|---|---|
| Helo Record Frame Size and Frame Rate | 1080p29.97 | 720p29.97 | ||||
| Type of Recording | Color and Resolution | Motion | Color and Resolution | Motion | ||
| 1000Kbps | 1080p2997 to 1080p2997 1000Kbps | 1080p2997 to 720p2997 1000Kbps | ||||
| 2500Kbps | 1080p2997 to 1080p2997 2500Kbps | 1080p2997 to 720p2997 2500Kbps | ||||
| 5000Kbps | 1080p2997 to 1080p2997 5000Kbps | 1080p2997 to 1080p2997 5000Kbps | 1080p2997 to 720p2997 5000Kbps | 1080p2997 to 720p2997 5000Kbps | ||
| 6000 – 10000Kbps | 1080p2997 to 1080p2997 10000Kbps | 1080p2997 to 720p2997 7000Kbps | 1080p2997 to 720p2997 7000Kbps | |||
| 11000Kbps+ | 1080p2997 to 1080p2997 15000Kbps | 1080p2997 to 1080p2997 20000Kbps | 1080p2997 to 1080p2997 15000Kbps | 1080p2997 to 1080p2997 20000Kbps | ||
Keep in mind, when you stream to a CDN, that is, after the Helo has encoded the video, the CDN may transcode your media further, so your image may take another hit in quality. Thus, it’s best practice to always test what the end signal looks like before going live.As a side note, and while it’s not aesthetic, the unit will get hot while recording and streaming. There is no fan, so the unit dissipates heat through the chassis….don’t freak out.
5. Who should use the Helo?
Portable switching devices like the TriCaster by Newtek are fantastic. But in addition to the switching, audio mixing, and graphics capabilities, they often are handling recording and streaming as well. This is a lot to burden 1 machine with. I like to spread out the points of failure if possible, and the Helo helps with that.
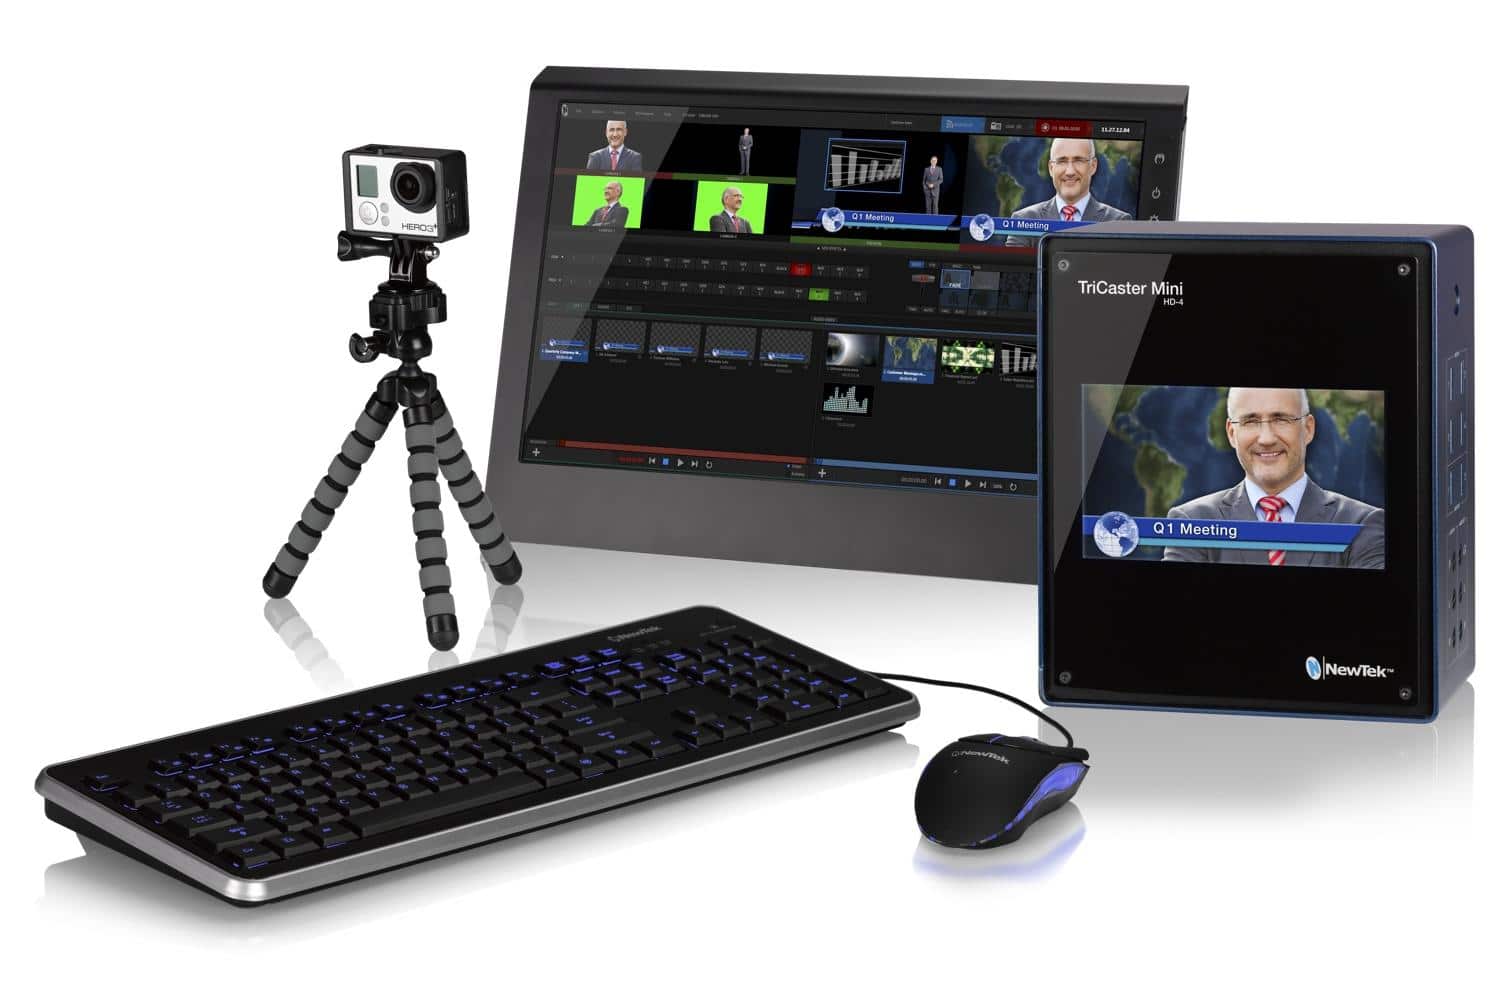
Newtek’s TriCaster Mini
The Helo is also a hardware encoder, rather than the software encoder that portable switchers or software switchers use, and hardware encoders traditionally mean better visual quality – and less potential for hiccups due to a computer system and it’s OS and everything else that the computer is doing.
The small footprint of the unit also makes it portable and lightweight for the aforementioned remote broadcasts. For sporting events and gamers, the larger frame size of 1080 and the progressive 60 frames ensure you’re getting as much info per frame as possible without compromising. Lastly, and something many users overlook is the value of support.
For years, AJA has had world-class support, and knowledge of not just their products, but how their product fits into typical workflows. It’s important to have that backup behind you when you jump into new gear. It’s also great for folks who handle events that need to be streamed but may not have uber technical people at the event. Churches and schools are a great example. The hard buttons on the front make it totally simple to operate.
Have more workflow questions on the web series? Maybe some improvements? Ask me in the Comments section. Also, please subscribe and share this tech goodness with the rest of your techie friends.
Until the next episode: learn more, do more.
Like early, share often, and don’t forget to subscribe.
Learn more about the AJA Helo: https://www.aja.com/products/helo
Hi Michael, I can’t find the examples of the recorded images that you mention in section 4.
Hello!
The chart halfway down the page lists resolutions – these are the recorded resolutions of the Helo. Click on them to see what they look like.
Thanks for watching!
Hi Michael, that was a great video. I’m looking to get more involved in live streaming. I guess this takes the place of OBS or Wirecast on your computer–yes? Also, can I bring a wireless router to the event and use my wifi router to give this box an ethernet connection?
Hi Robert: yes, this would take the place of a software based encoder. I find with encoding (especially live streaming) you need something more reliable than an app sitting on an OS. Hardware encoders tend to be a bit more reliable and stable.
You can certainly bring a wireless router for an internet connection, but the best way to get a dedicated line. Dropouts, when you go wireless, are VERY common. LiveU is great for this, it streams AND gives you internet connection over bonded 4G.
Thanks for watching!
Hi Michael, I’m sold on the benefits of a hardware encoder. Are there one or two hardware encoders that you recommend? Is there a certain feature to look for, such as h.264 & h.265 encoding? Who are the top contenders? Thanks!